
Beginners guide to buying your first crypto in New Zealand
Sometimes it’s hard to know where to begin, so here is the simple guide to getting started. The goal here is to create a “Play” wallet to get familiar with the technology and have a play around with some dapps (decentralised apps) before taking things to the next level. You will not be using this wallet for real investing, we will use cold storage for that.
For this tutorial, we will be using BNB Chain. This is because the ecosystem has lots of fun things for us to play around with, and has much cheaper gas fees (transaction costs) which is better for the purpose of this “play” wallet.
Step 1 - Open an account with EasyCrypto
We will need a way to turn our $50 NZD (aka fiat) into crypto. This is called “on-ramping”. I recommend EasyCrypto1 because they have a simple registration process, an easy-to-use website, and excellent service. Given that they are headquartered in NZ and are a registered financial service provider (verify here) you are safer than dealing with overseas entities.
Step 2 - Set up a Wallet
Because EasyCrypto are a non-custodial service, they do not store your crypto on your behalf. Therefore you will need to provide a wallet address where the crypto should be sent to.
If you don’t have one already, I recommend the Exodus wallet which comes in three versions which can all sync together:
A browser extension wallet (You will need Chrome or Brave browser) which is great for interacting with dapps (decentralised apps). We might use this later.
A desktop version which we can use to set up cold storage along with Trezor hardware wallet when we start accumulating to hold long term.
A mobile version - great for using on the go, including using the integrated Bitcoin Lightning wallet. We will be using this today.
Alright first we need to set up the app and wallet:
Head to the app download page and install the app on your phone.
Follow the prompts to Create Wallet
You will be shown your new wallets Seed Phrase, or else you can find it in the Security section. Store this somewhere safe (not online). NEVER GIVE THIS TO ANYONE as it can be used to drain your funds. Any emails or messages asking for this are a scam!
Next we want to determine our wallet address (technically called a public key) where we can send our BNB so it ends up in the right place.
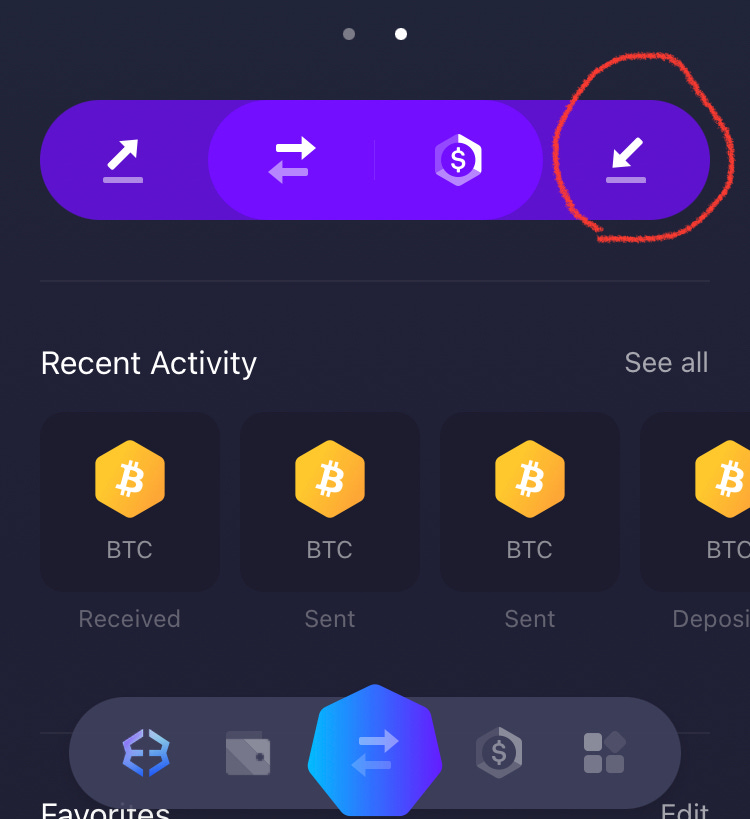
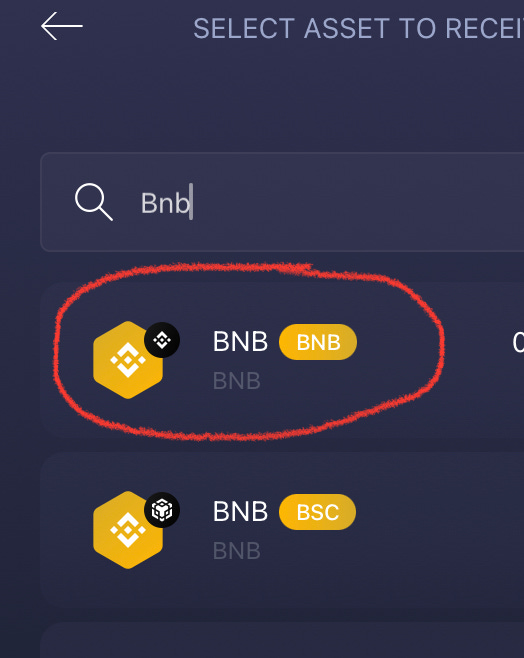
Select Receive (see below) and search for BNB
Chose BNB on the BNB network (see below)
This is what we need to give to EasyCrypto as a destination for our BNB that we will purchase. The address should start with “bnb” with a string of random digits, it is a public key that anyone can inspect using this tool. All transactions will be recorded forever! This is why, for privacy reasons, we want to avoid linking our real-world identity to a wallet address if we can help it. Posting the wallet address on social media would be an example of what not to do


Step 3 - Purchase BNB and send to your new wallet
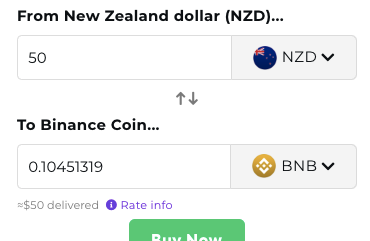
With your new EasyCrypto account, purchase $50 of BNB (Binance Coin)
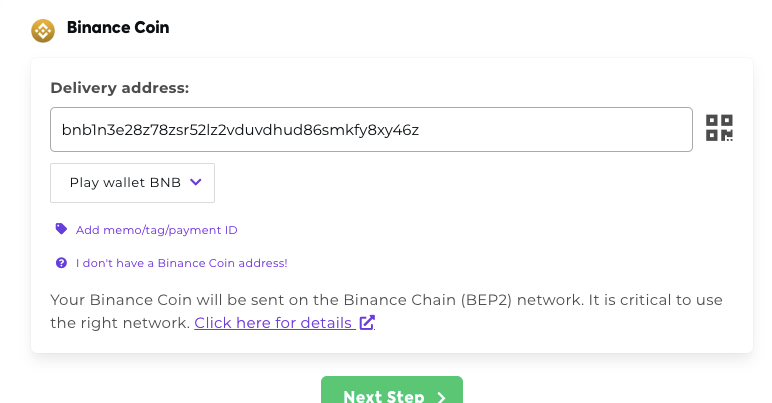
Copy & paste your new BNB wallet address into the Deliver Address Field (You can also use your webcam to scan the barcode). Never try to type it out manually!
Optional step: Save it to your address book as “Play Wallet BNB”.
You will then see the various payment methods, I like to use Account2Account. If you are nervous about this method and have the time, the bank transfer method is another option.

All done!
Within 5 minutes (unless you chose bank transfer method) you should see the BNB in your Exodus app wallet. Congratulations! You have joined the Early Adopters of blockchain technology, and the fun has only gotten started.
Next week we will experiment with DEXs - Decentralised Exchanges. They allow us to swap crypto from one type to another all through smart contracts with no middleman. They are entire economies all themselves, can’t wait to show you.
This is an affiliate link, meaning if you join through this link it supports me and costs you nothing extra.